• Award Winning Company

  • Super Fast Shipping

  • Free UK Shipping on Orders > £60 *

  • 5 Star Customer Service

  • 100% Secure Shopping

A6 Vellum

In stock
SKU
A6-VEL

Our A6 vellum blank card is precut for you to use as part of your wedding invitation design and is ideal for wedding menus and other items of on the day stationery. Our cut vellum sheet or postcards are ideal if you're making DIY wedding invitations.

To order: choose your vellum weight and quantity.

Our A6 vellum blank card sheet is available in multiples of 4.

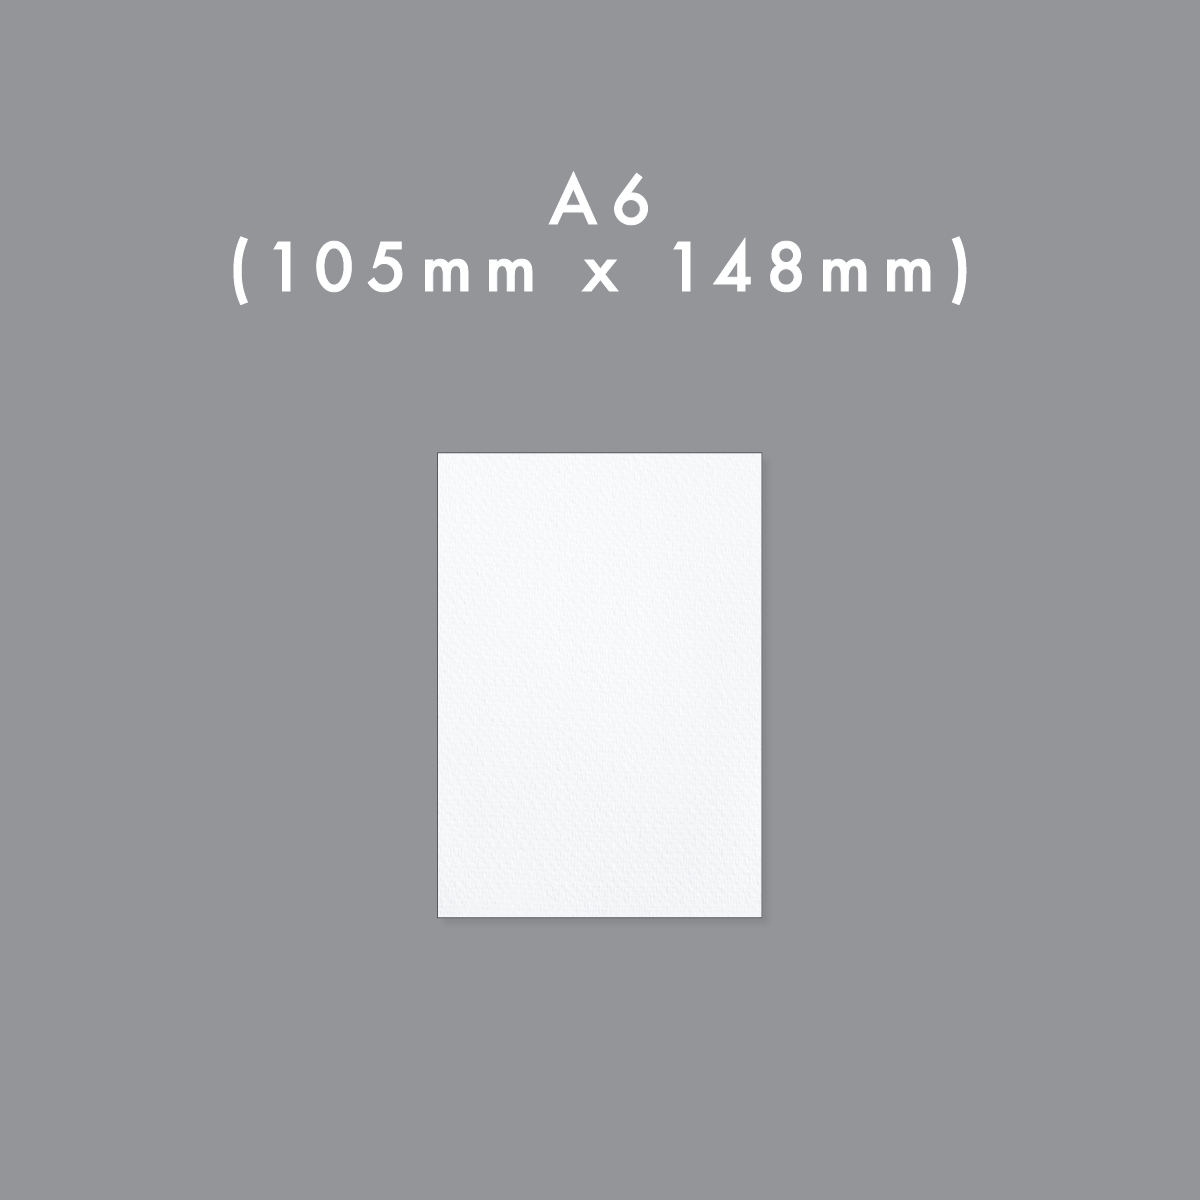
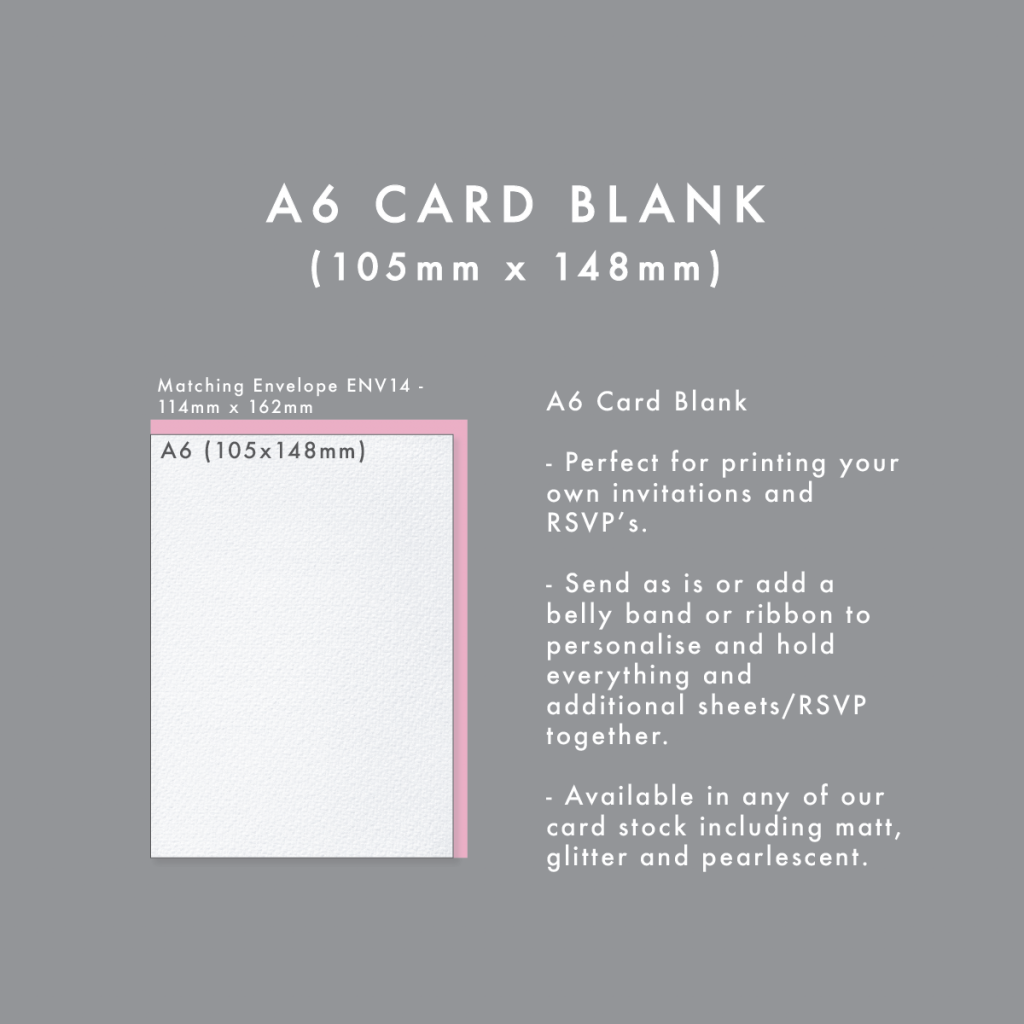
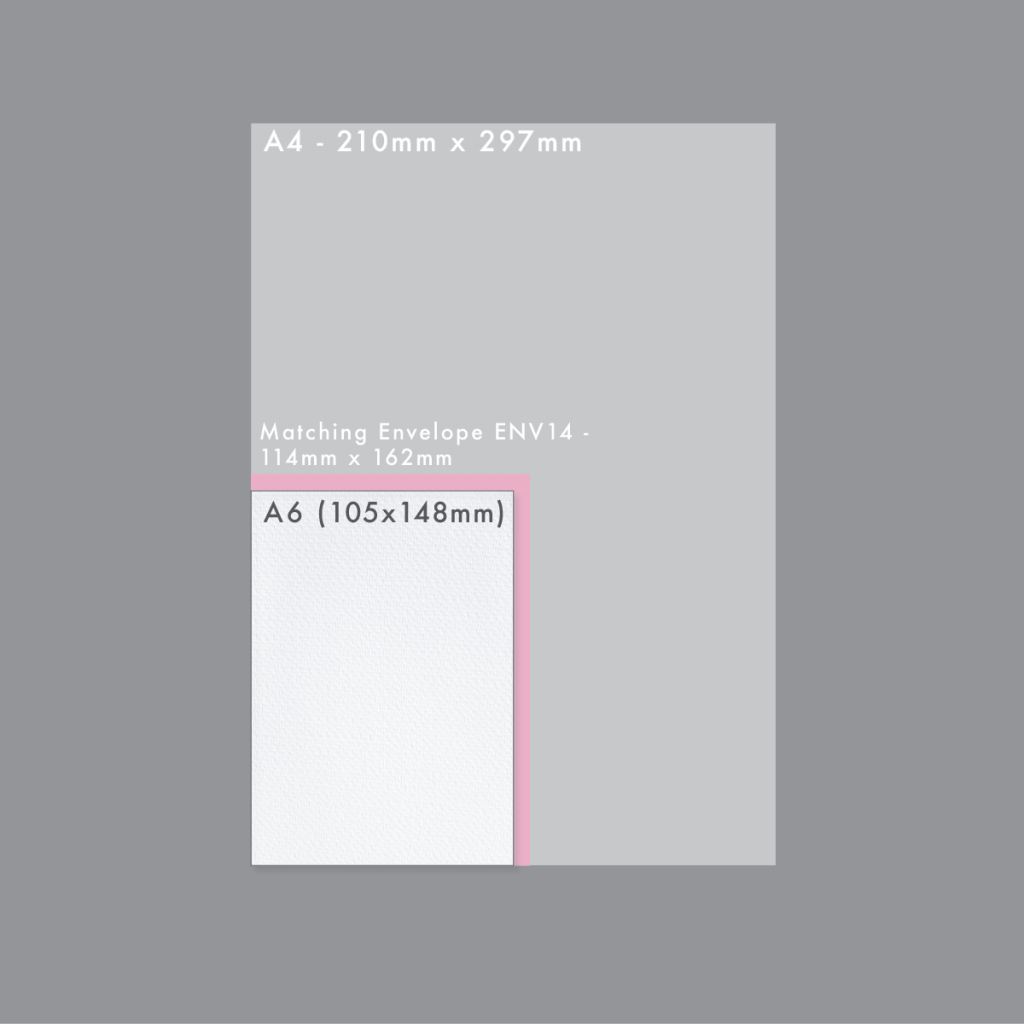
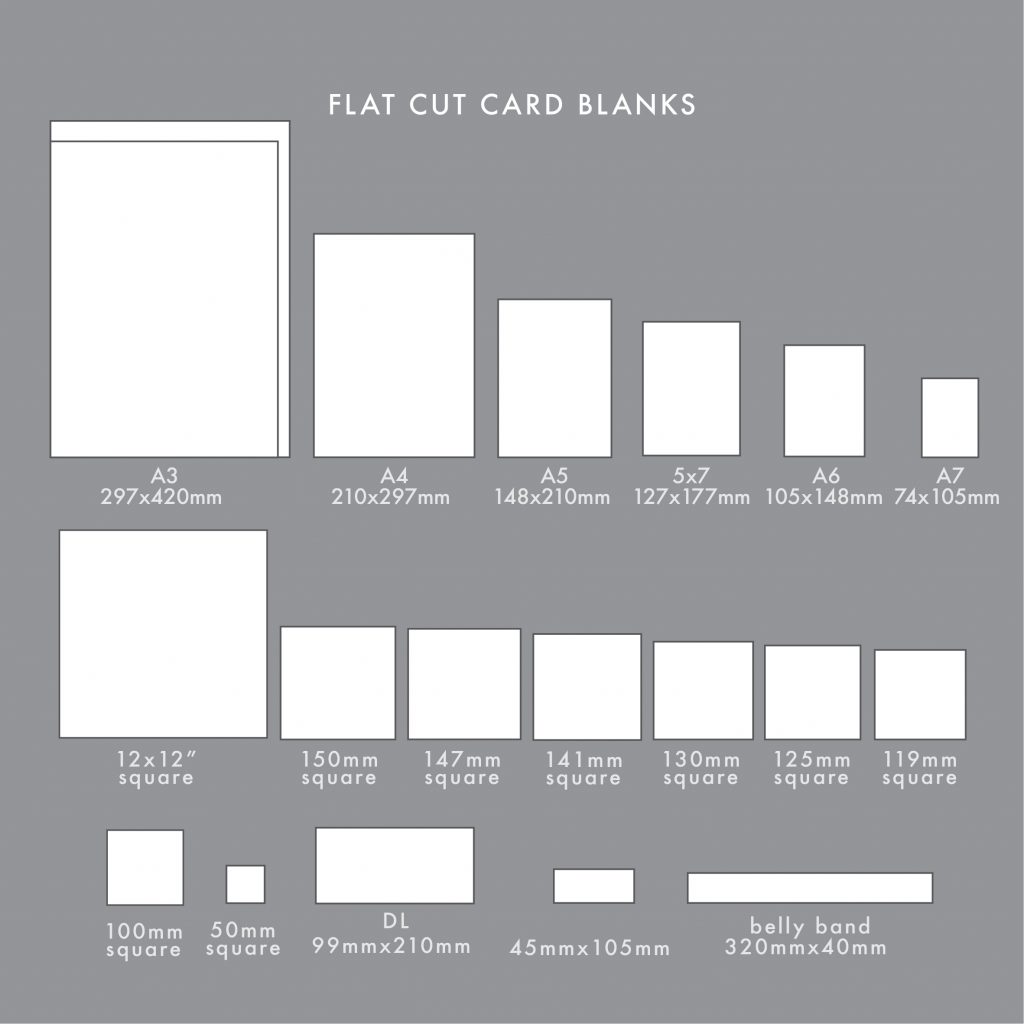
Our A6 vellum blank card sheet is 105mm x 148mm approx.


PRODUCT SPECIFICATION

PRODUCT DIMENSIONS

Our A6 vellum blank card is 105mm x 148mm approximately.

£0.00


  • Buy 250 for £0.14 each and save 22%
  • Buy 100 for £0.14 each and save 22%
  • Buy 50 for £0.15 each and save 17%
  • Buy 20 for £0.16 each and save 11%
  • Buy 10 for £0.17 each and save 6%
DIGITAL PRINT
DIGITAL FOIL
DIGITAL PRINT & FOIL
NO PRINT OR FOIL
- +
A6 Vellum is available to buy in increments of 4

Browse full range of:

A6 - infographic
A6 - ratio to a4 image

We have a vast range of high-quality blank card stock for you to choose from, including coloured cards, matt, pearlescent, textured, glitter, recycled kraft and lots of essential whites, ivories and creams, including hammer and linen. All have matching A4 card available as well as being available in other popular sizes.

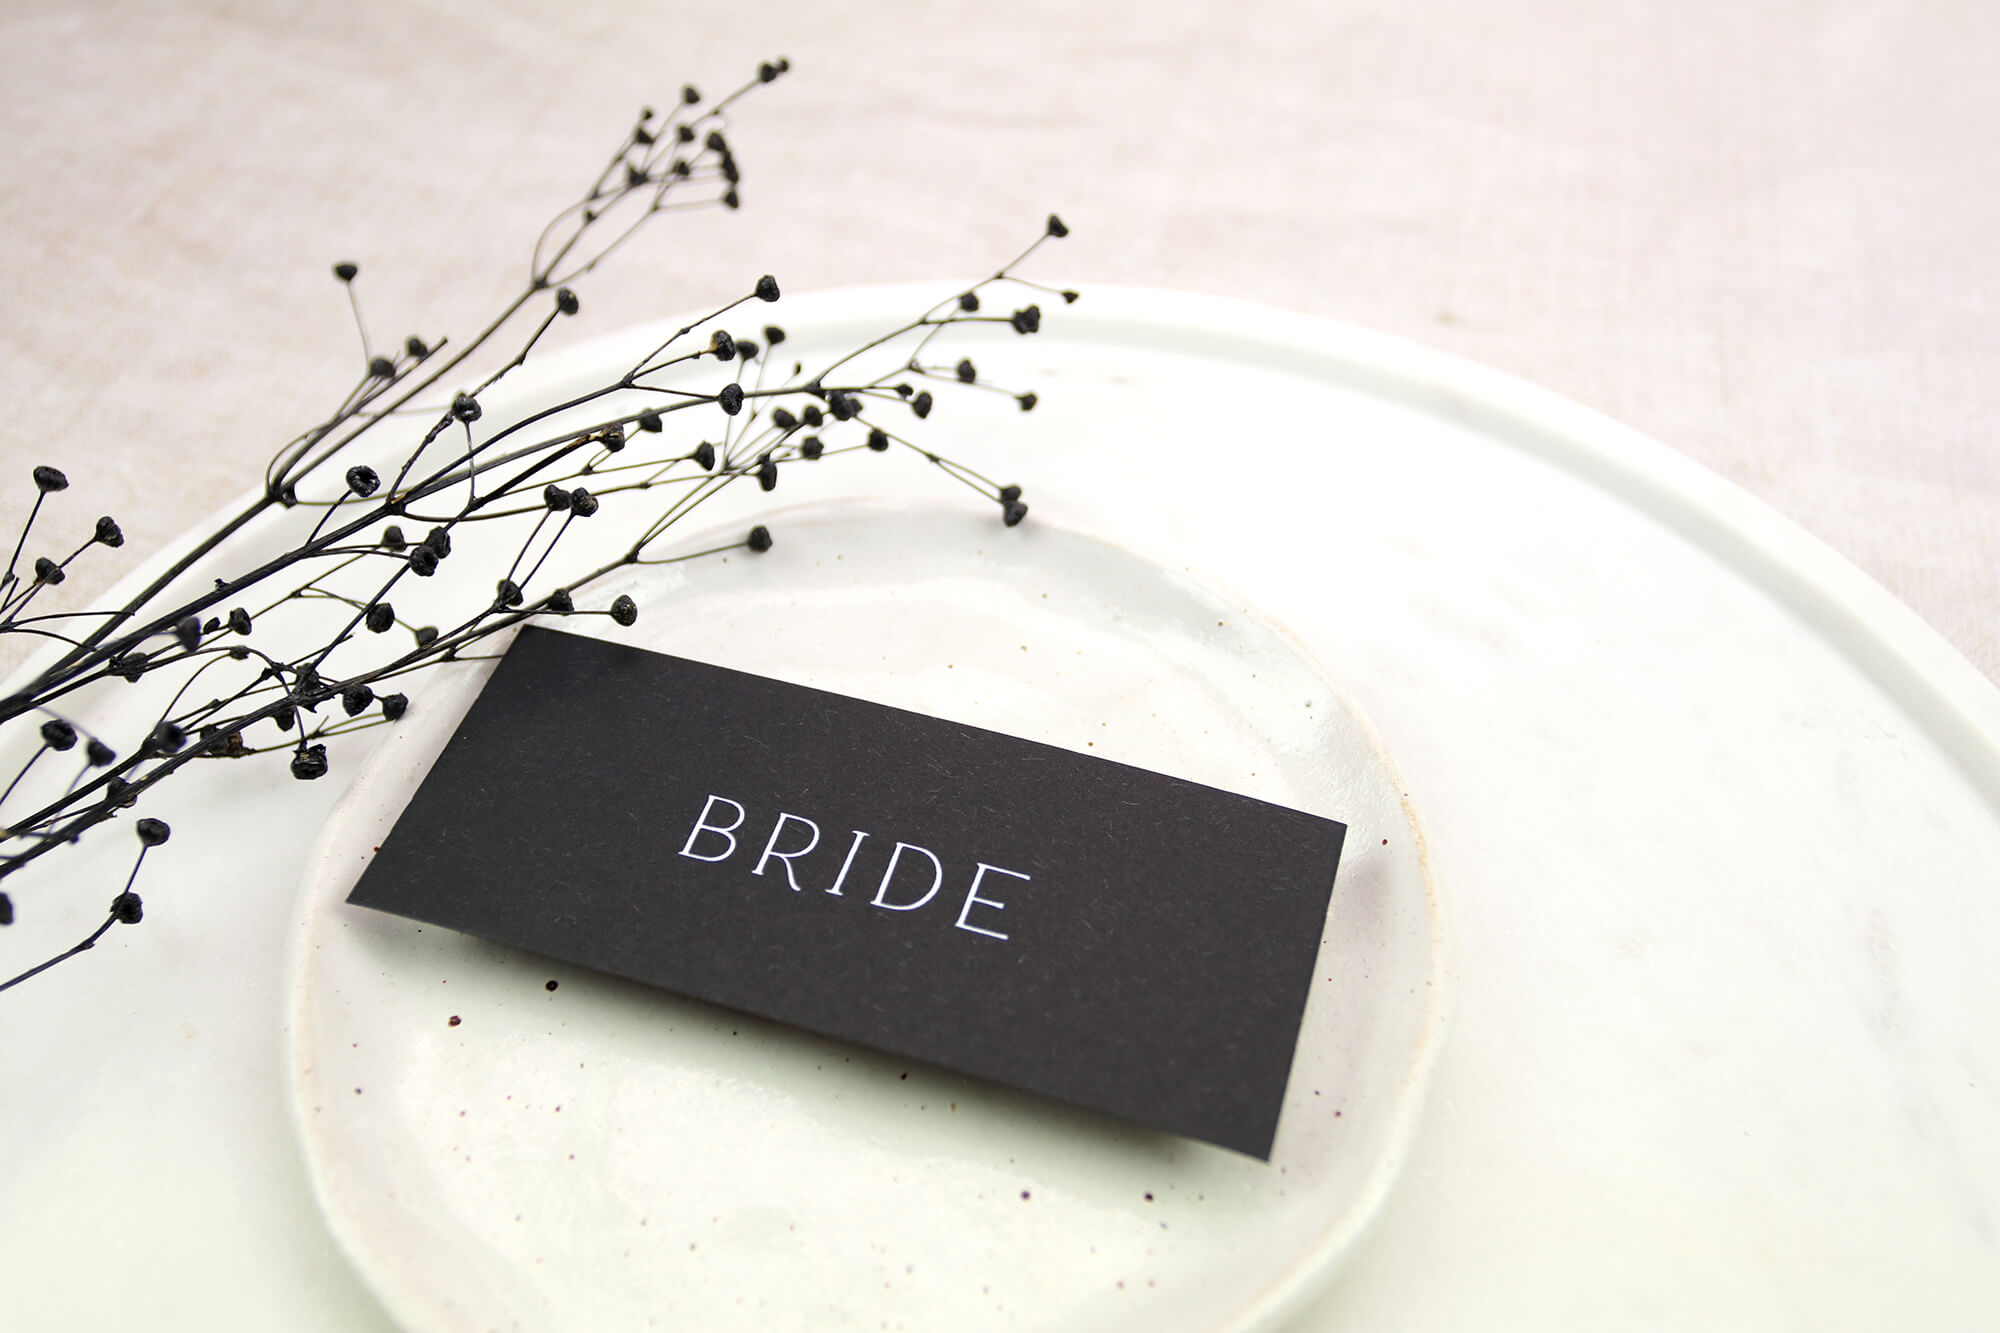
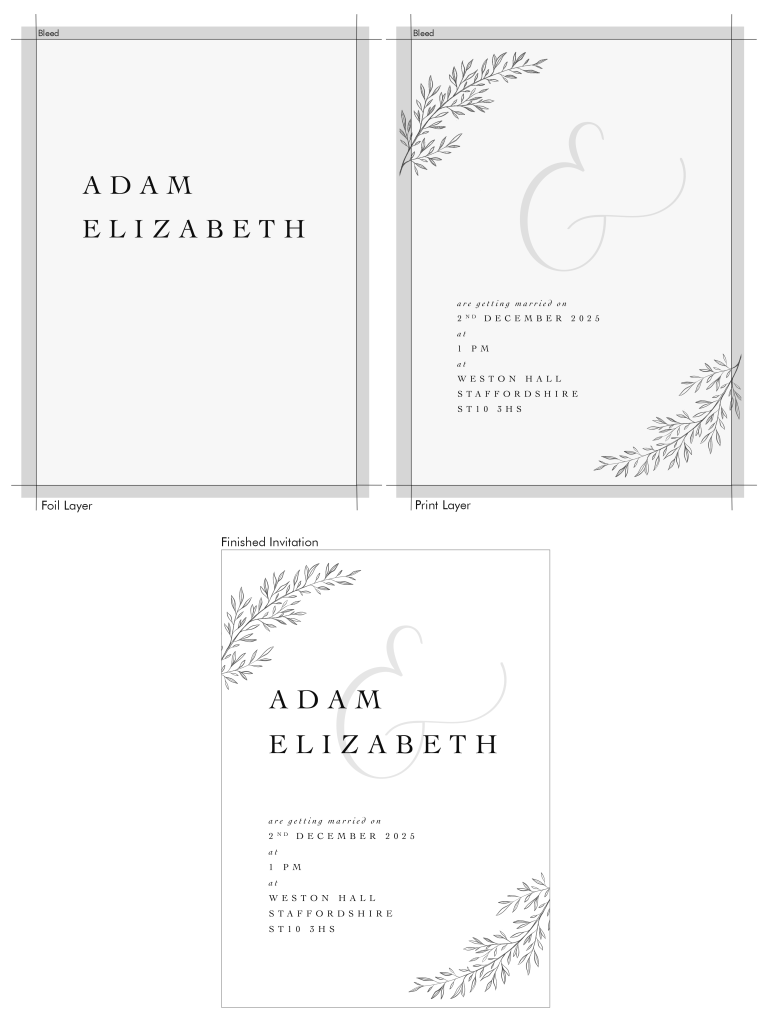
Our A6 Vellum is perfect for layering onto A6 flat blank cards or perfect to use on its own.

To complete your design, we have an extensive range of coordinating and matching C6 envelopes available to complete an invitation suite.

You should find printing on A6 vellum relatively easy, but we always recommend that you test in your printer before starting a longer print run. Take a look at our printing on vellum blog for tips.

Our A6 vellum is available in multiples of 4.

Please note that these products are cut to order and not returnable, so please double-check your requirements before ordering. Our cutting tolerance is plus or minus 1 or 2mm.

Digital CMYK Printing Guidelines and Terms

Digital printing is the process of printing digital-based images directly onto a variety of media substrates. Unlike offset printing, there’s no need for printing plates.

Digital printing technology has revolutionised the printing industry, offering high-quality, cost-effective solutions, particularly for small print runs for wedding invitations.

Unlike traditional methods, digital printing does not require physical printing plates. Instead, images are transferred directly from a digital file to the print medium. This eliminates the need for costly and time-consuming plate creation, reducing lead times and allowing for greater flexibility in printing projects.

The process is especially suited for colour printing, as it can easily handle complex, multi-coloured designs. Furthermore, digital printing enables on-demand printing, meaning that prints can be produced precisely when required, reducing storage and waste. However, while digital printing offers numerous benefits, it’s essential to follow our guidelines for the best results.

Artwork Guidelines for Digital Printing

When preparing artwork for digital printing, it’s essential to follow our guidelines to ensure the quality of the final product. These guidelines provide a framework for creating print-ready files that can be easily translated into high-quality prints.

White Printing Place Card
White printing for wedding place cards

Quick Print Guide and Common Print Issues to Avoid

1. Double check that your files are centred, if the artwork is not properly centered then the final print will not be centered.
2. Double and triple check spellings; we cannot correct spelling mistakes.
3. Check the font is embedded or converted to curves to avoid errors in the final print.
4. Include a bleed in all artwork (do not crop them out). The only files that do not require a bleed are those for printing onto envelopes.

Setting up your Artwork

File Format and Resolution

For optimal results, all artwork should be created and saved in CMYK colour mode.

Artwork Format

• Please provide a print-ready PDF with one design per page at the correct size for all artwork.

• It is important that all text is converted to curves or outlines. This will ensure no changes occur to the fonts once they are printed.

Safe Area

All important text and graphics should be kept at least 5mm from the edge to ensure they are not cut off during printing. The safety line on our printing templates shows this, known as the safe area.

Image Quality

It is crucial to pay attention to the quality of the images. If you include a grainy or outdated photo in your artwork, the printed version will also look grainy and outdated. Remember that our digital presses can only reproduce the quality of the image you provide.

• Please ensure all images are saved in CMYK colour mode, not RGB. CMYK is the appropriate colour mode for printed materials, while RGB is only suitable for digital platforms.

• Please ensure that your images have a resolution of 300 dpi.

• For the best quality, save your photos as TIFF files and your vectors as EPS files. If the image appears pixelated on your screen, it will also print pixelated.

• Do not enlarge images beyond 100%, which will also cause pixelation.

Crop Marks and Bleed

wedding invitation with bleed
Invitation design showing bleed, trim line and safety area

Supplying your own artwork

• Please ensure all crop marks and bleed are visible in the artwork.

• Add a 5mm bleed to ensure that the print goes all the way to the edge of the sheet and avoids any white edges on your final printed product.

Supplying Artwork using our Templates

• Remove the crop marks and bleed line, but ensure the die cut /trim line is visible.

• Add a 5mm bleed to ensure that the print goes all the way to the edge of the sheet.

Borders

We do not recommend using thin borders within 5mm of the safe area edge.

Our products have a 2mm cutting tolerance, which may result in uneven borders. The thinner the border is, the more noticeable any small imperfections will become.

Our digital die-cutting registration will be almost perfect, but we still do not recommend thin borders less than 3mm wide or within 5mm of the safety area.

Colours and Colour Matching

It is crucial to convert RGB colours to CMYK for desirable results.

• Please note that there may be a colour difference between your screen and printed material as various factors can impact the colour when printing in CMYK (Cyan, Magenta, Yellow, Black).

• You cannot determine how colours will print based on your screen because every screen and printer displays colours differently.

• We calibrate the colours of our digital presses daily to ensure minimum colour variation. However, we cannot guarantee consistency due to the nature of printing in CMYK. There may be a potential colour variance of 5% from the initial proof to the final product.

• When selecting a colour, it’s important to consider the type of paper it will be printed on since this can affect how the colour appears.

Large Solid Areas of Colour

We advise against printing large solid areas due to banding and colour variation, which can sometimes occur.

Designs with blocks of solid colour are especially unsuited to textured stocks, as the toner’s fusing can be patchy. If blocks of solid colour are important to you, please choose a smooth stock.

Shapes

Please ensure that the front and back sides align correctly when ordering printing on both sides.

Sometimes, depending on the shape and orientation of the design, it may be necessary to reverse the cutting line. If you’re unsure whether to do this for the back of the design, you can create a small mockup by cutting out the shape and testing it. This will help you determine whether or not you need to reverse the shape.

This is critical for asymmetrical shapes.

Variable Data

Variable data refers to customisable elements in artwork, such as guest names on invitations and addresses on envelopes.

  • If you have variable data like multiple names and addresses, set them up as one per page. For instance, if you have 20 guest names, your PDF artwork should be 20 pages long.
  • If you select double-sided printing, your PDF should have double the number of pages, i.e. for 20 guest names, your PDF artwork should be 40 pages long.
  • For double-sided print, arrange your pages as follows: Page 1 Front, Page 2 Back, etc. If the reverse side is the same, please send this as a separate PDF page clearly labelled as the reverse print
  • If you cannot provide your variable data as a multi-page PDF, please purchase the variable data option with your printing.
  • You must send us your data in a single-column CSV file.
  • Please carefully check names, capitalisation and spelling, as data will be printed exactly as received. Please triple-check for any spelling, grammar or punctuation errors.

Trimming

We always take great care with our services. However, please be aware that there may be slight variations to any guillotined product.

We recommend allowing a +/- 1mm tolerance for guillotining when designing your invitations or stationery. This is the accepted industry standard.

Cardstock Options

We carry so many board stock options, and availability can fluctuate. We will contact you if there is an issue with your chosen stock.

Additional Guidelines for Digital White Printing

  • It is important to set up all artwork as 100% Black CMYK (0C, 0M, 0Y, 100K).
  • Black text and graphics will print in white, with lighter whites comprised of halftones.
  • We do not recommend printing solid white.
  • We provide white ink printing services on a wide range of paper stocks that we have available. We recommend choosing stocks that are darker in colour so the white ink will be legible. If you select an unsuitable stock, we will contact you and offer an alternative.

Artwork Guidelines for Digital Print and Foil

Preparing your artwork for printing, especially when incorporating unique elements like digital foil, involves specific steps to ensure quality and accuracy. Here’s a guide to set up your artwork effectively for foil and digital print.

When you’re preparing to print with digital foil, you need to consider the design elements that will be foiled. Digital foiling adds a metallic or reflective effect to your prints, which can enhance certain details of your design and add a touch of luxury or emphasis where desired.

Printing Requirements

To ensure a seamless and high-quality print, follow these requirements closely:

Use a Bleed

A bleed is necessary for all printed materials. This means that the artwork should extend beyond the edges of the final cut size of your card to avoid white edges that can occur from slight misalignments in the printing and cutting process.

We use a 3mm (for SRA3 sheets) or 5mm bleed depending on the product and have templates for you to work with.

Create Separate PDF Files for Artwork and Foil

You will need to create two PDF files of your design (these can be you artwork layers in Illustrator):

  • One PDF will showcase your artwork without the foil layer.
  • The second PDF will display only the foil layer.

Make sure that you hide the respective layers in each file to accurately represent how the final product should appear for each part of the print process.

Apply the same bleed to both documents.

Artwork Layers for Digital Foil and Print
Layers for digital foil and print

Foil Layer Considerations

For the foil elements, use a vector-based program like Adobe Illustrator to create a separate layer for elements that will be in foil.

Foil design elements should be set in 100% black colour to indicate where the foil will be applied to the design

High-Resolution Files

All artwork should be set up at a minimum of 300 dpi (dots per inch) to ensure high-quality print resolution.

Colour Mode and Profile

Set your colour mode to CMYK (Cyan, Magenta, Yellow, Key/Black) since this is the colour profile used for printing.

Font and Stroke Considerations

Outline or embed all your fonts to avoid any issues with font substitutions.

Check that strokes are at a suitable thickness to ensure foil elements are clear and visible. We recommend adding a stroke to any fine/small text of at least 0.1mm.

Saving Your PDF Files

When saving your PDFs, use these settings to maintain print quality:

  • Choose the ‘Press Quality’ preset in your PDF export options.
  • Ensure that the bleed is included during the export process.
  • Double-check that all layers are correctly set and shown in both PDFs as intended (one with just the design and one with just the foil elements).

Print Alignment and Borders

Regardless of the foiling machine or process used, whether by us or others, the sheet will always move to some degree. This tiny movement is an inherent attribute that must be considered when creating your artwork. Our tolerance level is approximately 1mm in any direction, primarily caused by paper movement. While this minor discrepancy may go unnoticed in most artwork, highly intricate designs may require adjustments for printability.

Borders:

We do not recommend using thin borders within 5mm of the safe area edge.

Our products have a 2mm cutting tolerance, which may result in uneven borders. The thinner the border is, the more noticeable any small imperfections will become.

Our digital die-cutting registration will be almost perfect, but we still do not recommend thin borders less than 3mm wide or within 5mm of the safety area.

Proofing

Proof Approval

  • Before we proceed with the final print, we will send you a digital proof of your artwork. Please review this proof thoroughly, checking for any text, layout, or colour errors.
  • We also offer a physical proof for £5. In this case a physical copy will be sent to you after the you approve the digital proof. Subsequent physical proofs will be charged at £5.
  • We offer one free digital proof and amendment (followed by the amended proof). Further proofs, revisions and amends are charged at £10 per change. This includes wording, layout, colour, item, or quantity changes.
  • Approval of the proof confirms you are satisfied with the layout and colour representation and authorizes us to proceed with printing. Please note we will not be held responsible for any errors found after this stage.

Why should I purchase a Physical Proof?

  • We highly recommend ordering proofs to ensure that all design elements are properly embedded and colour balance is satisfactory.
  • Layering graphics in your design or placing a watermark image behind your fonts can cause issues such as distorted or missing fonts, blocks of white or colour appearing behind graphics where they shouldn’t be visible in the file, or even graphics not showing up in print at all. Be mindful of these layering issues to ensure your designs come out as intended.
  • Fonts that have very thin lines or that are lightly coloured may show up fainter than you anticipate.
  • It is impossible to accurately predict how artwork with varying opacity, such as a watermark, will appear in print. Watermarks printed on paper may sometimes appear too light or too dark, or even appear unclear and indistinct. Design elements with thin lines and light graphics may print faintly. Light grey shades can be particularly tricky.

Delivery and Turnaround

We strive to deliver your printed materials promptly. However, turnaround times can vary depending on the project’s complexity, quantity, and our current production schedule. Please allow ample printing and delivery time to meet your deadlines. Expedited services may be available at an additional cost.

Printing Terms

Errors that have been approved by the customer

  • We cannot accept returns or process refunds due to errors in customer-supplied artwork, such as typos. Although we do our best to identify any errors during our pre-printing process, the final proofing responsibility lies with the client. Once you have supplied or uploaded your stationery, it will be printed exactly as provided.
  • If you find an error in your stationery, contact us. We offer discounted reprints and rush service for customer errors.
  • If the design on your printed stationery does not match your uploaded artwork, contact us immediately for a free reprint.

Printing colours can differ from the colours that appear on screens

  • We cannot accept returns because your printed stationery does not match the colours you see on your screen. This is because all monitors and screens display colour differently and may not accurately represent how your order will print.
  • We highly recommend ordering a printed sample if you are concerned about colour.
  • We colour calibrate our digital presses daily to minimize colour variation. However, consistency is not guaranteed; this is simply the nature of printing in CMYK. There is potentially a 5% variance in colour from the first proof/print to the final product.
  • If for some reason you do not like the colours you chose, don’t hesitate to get in touch with us. We’ll be happy to work with you on a discounted reprint.

If you have already approved the printing and wish to cancel the order

  • Should you need to make changes or cancel your order after uploading artwork, contact us immediately. We may be able to cancel your order before production begins.
  • If your order is currently being printed, we may be able to halt the process and make a partial refund on your behalf. However, once the printing stage is complete, we will be unable to cancel the order, issue a refund, or accept a return.

Returning Bespoke Stationery

  • Bespoke stationery cannot be returned as it is created for you and cannot be resold.